

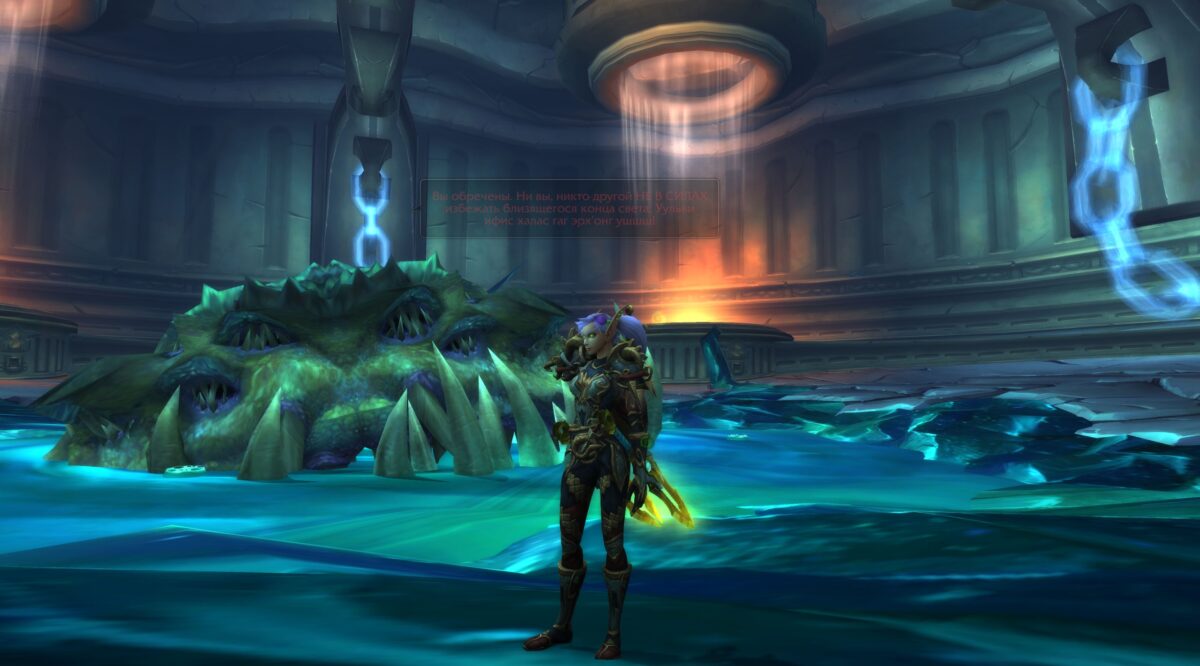
World of Warcraft's most challenging raids have pushed players to their limits across multiple expansions. You'll find iconic encounters in Burning Crusade's Sunwell Plateau, Wrath of the Lich King's Ulduar with Yogg-Saron Zero Lights, and Mists of Pandaria's Throne of Thunder. Vanilla's Naxxramas and Blackwing Lair set early benchmarks for difficulty. Warlords of Draenor's Hellfire Citadel and Legion's Tomb of Sargeras introduced complex mechanics and multi-phase fights. Icecrown Citadel's Arthas battle tested raid composition and perseverance.
Battle for Azeroth's Ny'alotha, the Waking City, challenged teams with Old God mechanics. Each raid has contributed to WoW's legacy, shaping the endgame experience players crave.
Key Takeaways
- Naxxramas (Vanilla) set the benchmark for early WoW raiding difficulty with intricate boss mechanics and challenges like the Four Horsemen.
- Throne of Thunder introduced extensive mechanics and environmental hazards, requiring precise positioning and communication among raiders.
- Tomb of Sargeras featured demanding encounters, including the multi-phase Kil'jaeden battle, which required mastery of multiple complex mechanics.
- Ulduar's Yogg-Saron Zero Lights encounter simulated insanity through multiple phases, demanding precise execution and adaptive strategies.
- The Black Temple was pivotal in The Burning Crusade, with encounters like Illidan Stormrage requiring robust coordination and strategic execution.
The Burning Crusade's Sunwell Plateau
Anyone who raided during The Burning Crusade expansion will likely remember Sunwell Plateau as a pinnacle of difficulty and excitement. This raid zone, steeped in Sunwell lore, presented an unprecedented challenge for even the most skilled players. You'd face six formidable Sunwell bosses, each requiring meticulous strategy and coordination.

The first encounter, Kalecgos, immediately set the tone with its complex multi-phase fight. You'd battle not only in the physical domain but also in a spirit world, demanding precise timing and communication. As you progressed, you'd confront M'uru, widely regarded as one of the most difficult encounters in WoW history. Its tight enrage timer and unforgiving mechanics pushed raid teams to their limits.
The final boss, Kil'jaeden, served as the ultimate test of your raid's skill and perseverance. You'd need to master intricate positioning, interrupts, and add management while contending with a constantly shifting battlefield. The Sunwell Plateau's difficulty was further amplified by its release timing, arriving just before the Wrath of the Lich King expansion and leaving little time for players to clear it at level.
Ulduar's Yogg-Saron Zero Lights
Yogg-Saron's encounter in Ulduar presents a multi-phase challenge that tests your raid's coordination and mental fortitude. You'll face intricate mechanics that simulate insanity, requiring precise execution and adaptability as the fight progresses. The "Zero Lights" variant intensifies the difficulty, demanding flawless strategy and unwavering focus to overcome this Old God's madness-inducing assault.
Complex Multi-Phase Encounter
Without a doubt, the Yogg-Saron encounter in Ulduar stands as a pinnacle of multi-phase raid design. You'll face a complex battle that demands mastery of boss synergy and phase changes. Your raid's teamwork dynamics will be put to the test as you navigate through three distinct phases, each requiring unique encounter strategies.
Your raid composition is essential, as you'll need a balance of roles to handle various mechanics. Threat management becomes increasingly important as you progress, with tanks needing to maintain control over multiple targets. Damage mitigation is key, particularly in the final phase where Yogg-Saron's attacks can quickly overwhelm unprepared raiders.

Spatial awareness is paramount throughout the encounter. You'll need to position yourself carefully to avoid detrimental effects while maximizing damage output. Mechanic prioritization is essential, as you juggle multiple tasks simultaneously. From managing sanity levels to destroying brain links, you must make split-second decisions on what to focus on.
Timing precision is the linchpin of success. Coordinating cooldowns, interrupts, and phase changes requires meticulous planning and execution. Only by mastering these elements can you hope to defeat Yogg-Saron with zero lights active.
Insanity-Inducing Boss Mechanics
The insanity-inducing mechanics of Yogg-Saron's zero-light encounter push raiders to their mental limits. You'll face mind-bending puzzles that test your team's ability to solve complex challenges under pressure. Punishing environmental hazards force you to stay alert and adapt quickly, while the stylish visual design creates an immersive, otherworldly atmosphere.
Seamless group coordination is essential as you navigate through dynamic phase changes and execute intricate positioning strategies. You'll need to master overwhelming adds management while maintaining focus on the main boss. Unforgiving enrage timers keep you on edge, demanding peak performance from every raid member.

The unique encounter lore adds depth to the fight, immersing you in the Old God's twisted domain. Intense sound design further amplifies the tension, making you feel as if you're truly losing your grip on reality.
To succeed, you must maintain perfect execution across multiple phases, juggle numerous mechanics simultaneously, and push your limits of concentration. Yogg-Saron zero lights stands as a proof of WoW's ability to create truly challenging and memorable raid encounters.
Throne of Thunder
The Throne of Thunder raid presents you with an array of complex mechanics and hazards that demand precise coordination and strategy. You'll face treacherous environmental challenges, intricate boss abilities, and punishing raid-wide effects that test your team's adaptability and awareness. The climactic encounter with Lei Shen pushes your limits, as you contend with his relentless assault of lightning-based attacks and phase shifts that require split-second decision-making.
Complex Mechanics and Hazards
Throne of Thunder stands out as a demonstration to intricate raid design, presenting players with a gauntlet of complex mechanics and hazards. You'll face encounters that demand precise raid positioning and flawless mechanic communication. Each boss fight tests your ability to adapt to rapidly changing phases while maintaining the best damage mitigation.
Your raid composition becomes vital, as certain classes and roles shine in specific encounters. You'll need to master encounter strategies that involve intricate boss targeting and split-second attack timing. Environmental awareness is paramount, with hazards like lightning strikes and moving platforms keeping you on your toes.

Healing coordination takes center stage in fights like Durumu the Forgotten, where players must quickly identify and respond to various debuffs. The Council of Elders challenges your phase adaptability, forcing you to juggle multiple boss mechanics simultaneously. Lei Shen, the final boss, combines all these elements into a grueling test of skill and endurance.
To triumph in Throne of Thunder, you must excel in every aspect of raiding. It's a true crucible that separates casual players from dedicated raiders, rewarding those who can master its complex dance of mechanics and hazards.
Lei Shen's Relentless Challenge
Lei Shen, the final boss of Throne of Thunder, presents a relentless challenge that'll test your raid's limits. The Stormlord's tactics demand precise execution and unwavering focus from every team member. You'll need to master the art of avoiding his electromagnetic abilities while maintaining ideal DPS.
As you engage Lei Shen, be prepared for his lightning prison mechanic. This ability isolates players, requiring swift coordination to free trapped allies. The Thunderstruck strategy becomes essential during phase shifts, where you'll need to position correctly to avoid chain lightning effects.
Raid coordination is paramount when dealing with Lei Shen's area-of-effect attacks. You must spread out to minimize damage while staying close enough for healers to maintain efficiency. Resilience planning is vital, as the fight's duration will test your team's endurance and resource management.
Throughout the encounter, Lei Shen will cycle through different elemental phases, each presenting unique challenges. Adapt your tactics accordingly, adjusting positioning and priority targets as needed. Success against this formidable foe demands flawless execution, strategic thinking, and the ability to react swiftly to changing battlefield conditions.
Naxxramas (Vanilla)
Floating ominously above the Eastern Plaguelands, Naxxramas stands as one of vanilla World of Warcraft's most iconic and challenging raids. This necropolis, home to the dreaded Kel'Thuzad, offers a brutal test of player skill and raid composition. You'll face iconic encounters that have spawned nostalgic memories for veteran players, from the relentless Four Horsemen to the grotesque Patchwerk.
Naxxramas's dungeon design is a masterclass in environmental storytelling, with each wing telling its own tale of undeath and corruption. The raid strategy required here is complex, demanding precise coordination and flawless execution. You'll need to master intricate boss lore to understand and overcome each encounter's unique mechanics.
The loot mechanics in Naxxramas are equally compelling, with coveted items like the Corrupted Ashbringer driving players to push their limits. Challenge modes within the raid, such as the Immortal achievement, add an extra layer of difficulty for the most dedicated teams. Naxxramas set a new standard for raid complexity in WoW, influencing dungeon design for years to come and cementing its place in MMO history.
Hellfire Citadel
While Naxxramas set the bar for early WoW raids, Hellfire Citadel in Warlords of Draenor raised it to new heights. This 13-boss raid introduced complex Hellfire mechanics and Fel energy manipulation, challenging even the most seasoned raiders.
You'll face a gauntlet of diverse encounters, each demanding precise coordination and adaptability. The Iron Reaver tests your ability to manage positioning and dodge deadly area-of-effect attacks. Gorefiend's stomach phase requires split-second decision-making and flawless execution. Mannoroth pushes your limits with intense DPS checks and meticulous add management.
The pinnacle of the raid, Archimonde, presents a multi-phase fight that incorporates all the skills you've honed throughout Hellfire Citadel. You'll navigate through dimensional rifts, manage Fel corruption, and execute perfectly timed cooldowns to survive his devastating attacks.
Hellfire Citadel's difficulty is compounded by its unforgiving Mythic mode, which introduces additional mechanics and tighter DPS requirements. The raid's visual spectacle, with its fel-infused environments and imposing bosses, adds to the epic feel of each encounter. Mastering Hellfire Citadel demands not only individual skill but also exceptional teamwork and communication.
The Black Temple
The Black Temple stands as a pinnacle of Burning Crusade raiding, offering a grueling 9-boss challenge that'll test your guild's mettle. You'll face iconic encounters like Supremus and Mother Shahraz before confronting the infamous Illidan Stormrage himself. This raid isn't just about defeating bosses; it's about unraveling Illidan's Legacy and the birth of the Demon Hunter class.
As you progress through the temple's twisted corridors, you'll encounter diverse mechanics that demand precise coordination. The Reliquary of Souls forces you to adapt to three distinct phases, each requiring different strategies. Teron Gorefiend's construct phase adds a unique twist, where player deaths become temporary allies. The Illidari Council presents a multi-boss fight that'll push your raid's ability to multitask.
Prepare for Illidan's final encounter with a mix of anticipation and dread. You'll need to master phase shifts, handle demon forms, and survive his devastating abilities. The Black Temple's difficulty curve is steep, but conquering it rewards you with some of the most coveted loot and achievements in WoW history.
Icecrown Citadel
Icecrown Citadel looms as the ultimate challenge in Wrath of the Lich King, pitting you against the Scourge's mightiest forces. This raid's design masterfully weaves Frostmourne lore and the Lich King's legacy into every encounter, creating an atmosphere of immersion unparalleled in WoW's history.
Your raid composition is vital, with each role's significance amplified by the unforgiving mechanics. You'll need a balanced team, adept at coordinating complex strategies across diverse encounters. The raid's pacing is relentless, pushing your limits from the initial trash mobs to the epic showdown with Arthas himself.
Gear progression is tightly tuned, rewarding your perseverance with powerful upgrades. You'll face a gauntlet of bosses, each demanding precise execution and adaptability. From the chilling confrontation with Marrowgar to the heart-pounding Sindragosa fight, every victory inches you closer to the Frozen Throne.
The final battle against the Lich King is a reflection of Blizzard's raid design prowess. It's a multi-phase marathon that tests every aspect of your skills, culminating in a legendary weapon reward that cements Icecrown Citadel's place in WoW raiding history.
Tomb of Sargeras
The Tomb of Sargeras raid challenges you with some of WoW's most demanding encounters. You'll face the brutal Kil'jaeden battle, testing your reflexes and coordination against his relentless assault. Maiden's magical defenses and Avatar's crushing mechanics further push your raid team to master complex strategies and precise positioning.
Brutal Kil'jaeden Encounter
Brutal and unforgiving, the Kil'jaeden encounter in Tomb of Sargeras pushes even the most seasoned raiders to their limits. You'll face a multi-phase battle that demands precise coordination and flawless execution. The fight's complexity lies in its mechanics, which require you to master positioning, interrupts, and damage control.
Your raid team must navigate through Kil'jaeden's devastating abilities, including Armageddon and Felclaws. The Kil'jaeden strategy hinges on managing these mechanics while maintaining consistent DPS. You'll need to utilize the Light's mastery buff effectively, timing it with burst damage phases to maximize your team's output.
The encounter's difficulty spikes during the intermission phases, where you'll contend with Erupting Reflections and Shadowy Reflections. These add phases test your raid's ability to prioritize targets and maintain cohesion under pressure. As you progress, the fight intensifies with the introduction of Darkness of a Thousand Souls, a raid-wide ability that requires perfect execution of the soaking mechanic.
To triumph, you must master each phase's unique challenges while maintaining awareness of the overall fight progression. Only through practice and persistence will you overcome this formidable foe.
Maiden's Magical Defenses
Following the intensity of Kil'jaeden's encounter, you'll face the Maiden of Vigilance, a boss with formidable magical defenses in the Tomb of Sargeras raid. The Maiden employs a range of defensive spells and magical barriers that you'll need to overcome. Her primary mechanics revolve around Light and Fel energies, which you must manage carefully to avoid wiping your raid.
| Phase | Ability | Strategy |
|---|---|---|
| 1 | Light Infusion | Stack with same color |
| 1 | Fel Infusion | Spread out |
| 2 | Mass Instability | Dispel quickly |
| All | Titanic Bulwark | DPS through shield |
You'll need to coordinate your team to handle the Maiden's Light and Fel infusions. When infused, you must either stack with similarly affected players or spread out to avoid damaging others. The Maiden's magical barriers, like Titanic Bulwark, require sustained DPS to break through. During phase shifts, she'll cast Mass Instability, which demands swift dispelling to prevent raid-wide damage. Throughout the fight, you'll need to manage your positioning and cooldowns effectively to overcome her defensive spells and emerge victorious.
Avatar's Crushing Mechanics
Countless raiders have faced the Avatar of Sargeras, a behemoth whose crushing mechanics can quickly decimate an unprepared group. You'll need to master precise positioning and movement to survive this encounter. The Avatar's most notorious ability is Rupture Realities, which splits the room in half with a deadly void zone. You must quickly determine which side is safe and move there before the crushing weight of the ability destroys you.
Throughout the fight, you'll contend with Unbound Chaos, forcing designated players to run to specific locations to avoid wiping the raid. The Avatar's Touch of Sargeras ability targets random players, creating void zones that expand outward. Your raid must spread out to minimize damage and maintain avatar survival.
In the final phase, the boss becomes more aggressive. You'll face Darkening Soul, a debuff that must be dispelled at the right moment to avoid unnecessary deaths. The rain of fel meteors intensifies, requiring constant vigilance and movement. To succeed, you must execute flawless coordination, maintain strict positioning, and react swiftly to the Avatar's devastating mechanics.
Blackwing Lair
Nefarian's sinister lair beckons adventurers to one of World of Warcraft's most iconic raids. Blackwing Lair challenges you with a perfect blend of strategy and execution, demanding precise coordination from your 40-player raid team.
As you progress through the lair, you'll face increasingly complex encounters. The Razorgore fight tests your crowd control abilities, while Vaelastrasz pushes your DPS to its limits. Broodlord Lashlayer's knockback mechanics require careful positioning, and the Firemaw, Ebonroc, and Flamegor trio introduces unique tank-swapping strategies.
Chromaggus presents a formidable challenge with his ever-changing breath attacks and class-specific debuffs. You'll need to adapt your strategy on the fly, ensuring proper class balance to counter each breath type effectively.
The ultimate test awaits with Nefarian himself. His class call abilities force you to constantly adjust your tactics, punishing specific classes while rewarding others. Mastering Nefarian strategies is essential, as he exploits weaknesses in your raid composition. You'll need to manage adds, avoid shadow fissures, and maintain consistent DPS throughout the three-phase encounter to emerge victorious in this classic WoW raid.
Ny'alotha, the Waking City
The Old God N'Zoth's twisted domain comes to life in Ny'alotha, the Waking City, a 12-boss raid introduced in Battle for Azeroth's final patch. You'll face complex N'Zoth strategies that demand precise raid composition and exceptional team coordination. The raid's lore significance can't be overstated, as you confront the last Old God and unravel the corruption plaguing Azeroth.
Ny'alotha's encounter design shines with diverse fight dynamics that keep player engagement high throughout the instance. You'll navigate sanity mechanics, manage artifacts, and adapt to ever-changing battlefields. The raid's boss tuning challenges even the most seasoned groups, requiring meticulous planning and execution.
To succeed, you must master each boss's unique mechanics while maintaining overall raid awareness. Notable encounters include Il'gynoth's heart chamber and Carapace of N'Zoth, both testing your ability to balance multiple objectives. The final confrontation with N'Zoth himself is a true test of endurance and skill, pushing your limits across multiple phases.
Ny'alotha offers numerous raid achievements for those seeking additional challenges, rewarding mastery of its intricate encounters and solidifying its place among WoW's most demanding raids.
Frequently Asked Questions
How Long Does It Take to Complete Each of These Raids?
You'll find raid duration estimates vary widely based on your group's skill and experience. Top-tier raids can take anywhere from 2-8 hours for a full clear. To get accurate timings, you'll need to conduct an encounter mechanics analysis for each boss. Factor in time for trash mobs, breaks, and potential wipes. Remember, learning new raids takes longer initially. As you master the mechanics and optimize your strategy, you'll see clear times decrease considerably with each subsequent run.
What Are the Minimum Gear Requirements for Attempting These Raids?
Did you know that 96% of players fail their first attempt at high-tier raids? To tackle these challenges, you'll need to focus on gear progression. You should aim for item levels specific to each raid tier, typically ranging from 200 to 500+. However, gear alone won't guarantee success. You'll need to master complex raid mechanics, which often require precise coordination and timing. Remember, your gear should complement your skill level and understanding of each encounter's unique demands.
Which Classes Perform Best in These Challenging Raid Encounters?
You'll find that class synergy and role importance are vital in challenging raids. High damage output from DPS classes like Mages and Rogues is essential, while healers must master complex healing mechanics. Warlocks and Hunters excel at crowd control, and utility spells from Shamans and Druids can be game-changers. Tanks need solid tanking strategies for survival. All classes should focus on debuff management and buff optimization. Ultimately, your fight adaptability will determine success, regardless of class choice.
Are There Any Achievements Associated With Completing These Raids?
You'll find numerous raid achievements tied to these challenging encounters. They'll test your skills and reward your perseverance. You'll need to master complex encounter strategies to earn them. Some achievements require flawless execution, while others demand specific tactics or speed runs. You'll often obtain titles, mounts, or unique cosmetic items for your efforts. Remember, these achievements aren't just bragging rights; they're a demonstration of your raid team's coordination and skill in overcoming WoW's toughest content.
How Many Players Are Needed for Each of These Raids?
You'll need to assemble a team of 10 to 25 players for most challenging raids, depending on the specific encounter. Raid composition strategies are essential, so you'll want a balanced mix of tanks, healers, and DPS. Player coordination techniques become increasingly important as you tackle more difficult content. You'll need to master complex mechanics, execute precise rotations, and communicate effectively with your team. Remember, success hinges on your ability to adapt and work together seamlessly throughout each encounter.
Conclusion
You've journeyed through WoW's most formidable fortresses, each a symbol of the game's evolving challenge. From Blackwing Lair's fiery depths to Ny'alotha's twisted dreamscape, you've faced titans and Old Gods alike. These raids aren't just dungeons; they're crucibles that have forged legends. As you reflect on these epic encounters, remember: it's not just about the loot, but the bonds forged in the heat of battle. The next challenge always looms on the horizon.